Currency
Have a question? Speak to one of our experts on 0800 0886099
Useful Tools and Materials for Installing a Suspended Ceiling: A Checklist for DIY Installation
17
Feb
Useful Tools and Materials for Installing a Suspended Ceiling: A Checklist for DIY Installation
February 17, 2025
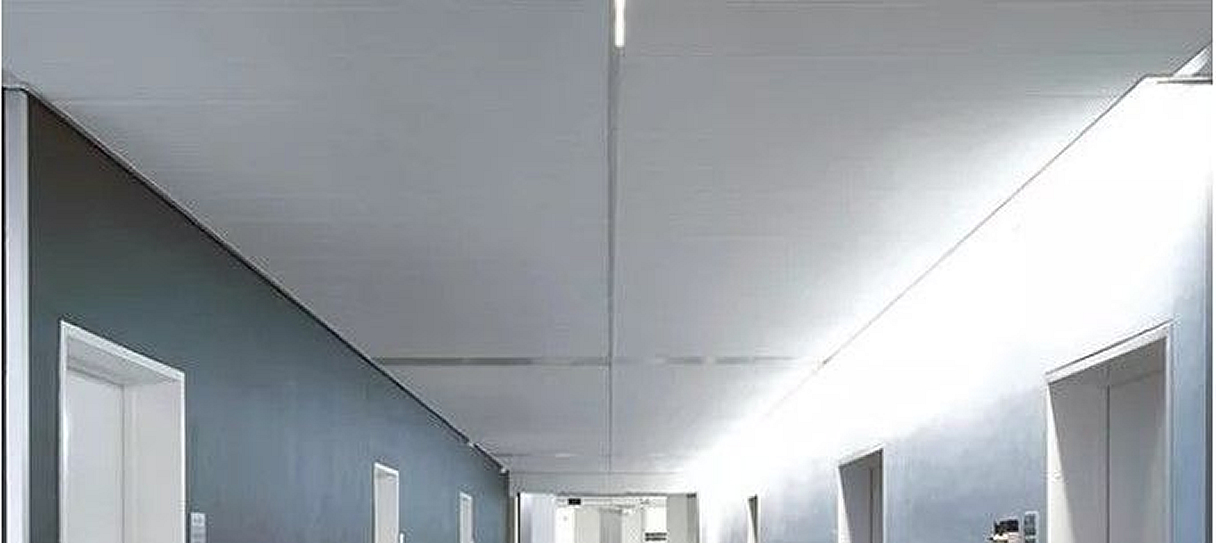
Installing a suspended ceiling transforms spaces by hiding unsightly pipes and wiring while creating a clean, professional look. A successful installation starts with having the right equipment ready before you begin the project.

To install a suspended ceiling, you need basic tools like a tape measure, spirit level, utility knife, screwdriver, and safety equipment including goggles and gloves, plus materials such as ceiling tiles, main tees, and cross tees. The perimeter trim and suspension wires are crucial components that provide support and create a professional finish.
Key Takeaways
- Proper safety equipment and measuring tools ensure precise, secure installation
- Quality ceiling tiles and grid components create long-lasting results
- Correct preparation and layout planning prevents costly mistakes during installation
Essential Tools for Installation
A proper suspended ceiling installation requires specific tools designed for accurate measurements, precise cutting, and secure mounting. The right tools make the task straightforward while ensuring professional results.
Laser Level or Chalk Line
Laser levelling tools provide the most accurate way to mark ceiling heights and ensure perfect alignment. A self-levelling laser projects perfectly straight lines across walls and ceiling surfaces.
Modern laser levels feature bright beams visible in daylight conditions. Many models include mounting brackets for hands-free operation.
A chalk line serves as a budget-friendly alternative. Though less precise than lasers, it works well for smaller rooms under 20 square metres.
Tape Measure
A sturdy 5-metre tape measure is essential for marking wall angles and grid spacing. Steel tape measures resist stretching and provide consistent measurements.
Look for models with clear markings in both metric and imperial units. The tape should lock firmly in place when extended.
A magnetic tip helps when working alone, as it can hold onto metal grid components during measurements.
Utility Knife
A sharp utility knife cuts ceiling tiles cleanly without crumbling edges. Retractable blades offer safe storage and quick blade changes.
Use heavy-duty blades designed for construction materials. Keep spare blades handy, as cutting tiles quickly dulls them.
Always cut on a stable surface using a straight edge as a guide.
Tin Snips
Professional-grade tin snips cut metal grid components cleanly without deforming edges. Straight-cut snips work best for most grid cutting tasks.
Choose snips with spring-loaded handles to reduce hand fatigue. Keep the blades oiled for smooth operation.
Wear gloves when cutting metal components to prevent cuts from sharp edges.
Cordless Drill
An 18V cordless drill with variable speed control drives fixings securely into wall angles and ceiling anchors. The drill should have sufficient torque for drilling into concrete.
Choose drill bits suitable for masonry work. A magnetic bit holder prevents dropped screws.
Keep batteries fully charged before starting work. A spare battery ensures uninterrupted progress.
Primary Materials and Fixings

A suspended ceiling requires specific materials designed to work together as an integrated system. The quality and compatibility of these components directly affect the stability, appearance, and longevity of the finished installation.
Ceiling Tiles
These lightweight panels form the visible surface of your suspended ceiling. Standard sizes include 600mm x 600mm and 1200mm x 600mm tiles.
The most common materials are:
- Mineral fibre (excellent acoustic properties)
- Metal (durable and moisture-resistant)
- PVC (ideal for wet areas)
- Glass fibre (lightweight and easy to cut)
Choose tiles based on your room's requirements for fire resistance, acoustics, and moisture resistance. Different tile materials offer varying levels of sound absorption and light reflection.
Main Tees
Main tees are the primary support runners that span the length of the room. These aluminium or steel pieces typically measure 3.6 metres in length.
Main tees feature:
- Rotary stitched web for strength
- Pre-punched slots for cross tee connections
- Built-in splicing mechanisms for joining sections
The tees should be positioned at 1200mm intervals across the ceiling space. Each main tee must be level and properly secured to prevent sagging.
Cross Tees
Cross tees connect perpendicular to the main tees, creating the grid pattern. They come in two standard lengths:
- 1200mm for rectangular grids
- 600mm for square grids
These components feature:
- Quick-release end tabs
- Self-centring design
- Built-in alignment features
The cross tees click securely into the pre-punched slots of the main tees, forming stable right angles.
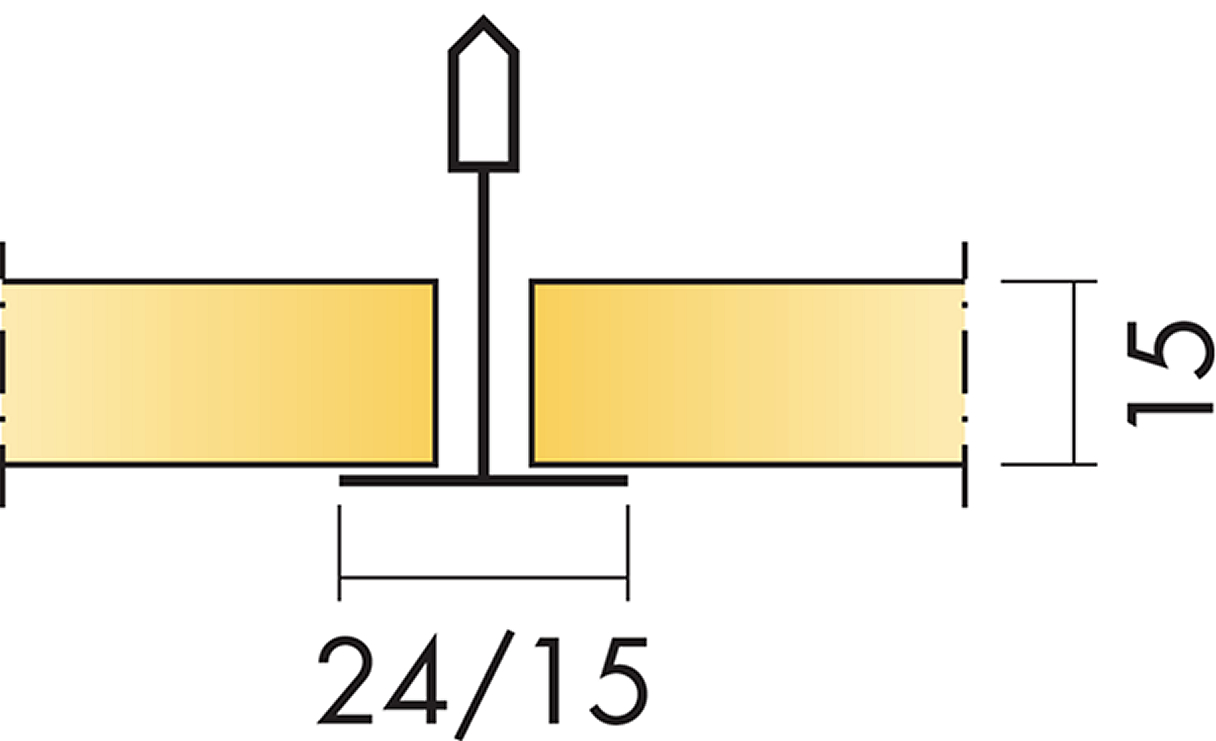
Wall Angles
Wall angles, or L-trim, provide support around the room's perimeter. They create a neat finish where the suspended ceiling meets the walls.
Key specifications:
- Standard size: 19mm x 19mm or 24mm x 24mm
- Material: White pre-coated steel or aluminium
- Length: Usually 3.6 metres
Proper installation requires fixings at maximum 300mm intervals for stability.
Hanger Wires
Hanger wires support the entire grid system from above. These galvanised steel wires connect the main tees to the structural ceiling.
Important details:
- Wire gauge: 12 or 14 (2.5mm-2.0mm)
- Spacing: Maximum 1200mm apart
- Load capacity: Must support 100kg per wire
Each wire needs proper tensioning to ensure the ceiling remains level.
Anchor Bolts
Anchor bolts secure the suspension system to the structural ceiling. The type of bolt depends on the ceiling material.
Common varieties include:
- Drop-in anchors for concrete
- Toggle bolts for plasterboard
- Beam clamps for steel structures
Each fixing point must support at least 100kg. Use corrosion-resistant materials in areas with high humidity.
Support and Safety Equipment

Safe installation of suspended ceilings requires proper support equipment and protective gear to prevent accidents and injuries.
Ladder or Scaffolding
A-frame ladders and scaffolding provide stable platforms for reaching ceiling height. A sturdy platform ladder with non-slip feet works well for rooms with standard ceiling heights up to 3 metres.
For higher ceilings or larger spaces, mobile scaffolding towers offer greater stability and a larger work area. The scaffolding must be properly assembled with guard rails and toe boards.
Regular inspections of ladders and scaffolding are essential. Check for damaged parts, loose fixings, or worn non-slip feet before each use.
Safety Glasses
Safety glasses protect eyes from falling debris and dust during installation. Choose glasses with side shields for complete protection from particles coming from different angles.
Anti-fog coatings help maintain clear vision while working overhead. Ensure the glasses fit properly and stay securely in place when looking up.
Keep safety glasses clean and scratch-free for optimal visibility. Store them in a protective case when not in use.
Dust Mask or Respirator
Cutting ceiling tiles and grid components creates fine dust particles. A properly fitted FFP2 dust mask filters out these harmful particles.
For extensive cutting or working with mineral fibre tiles, use a respirator with replaceable filters. Change filters according to manufacturer guidelines.
The mask should form a tight seal around the nose and mouth. Facial hair can prevent proper sealing, so consider this when choosing respiratory protection.
Work Gloves
Cut-resistant gloves protect hands from sharp grid edges and tools. Choose gloves that balance protection with dexterity for handling small components.
Breathable materials prevent hand sweating during extended wear. Ensure gloves fit snugly without restricting movement.
Replace gloves when they show signs of wear or damage. Keep a spare pair ready for immediate replacement if needed.
Preparatory Work and Layout
Proper planning and layout form the foundation of a successful suspended ceiling installation. Precise measurements and clear markings will ensure correct alignment and prevent costly mistakes during the build.
Measuring and Planning the Grid
Draw a detailed ceiling plan before starting any physical work. The plan must include the positions of lights, vents, and other fixtures.
Take accurate room measurements, including length and width. Add 10% extra to material calculations to account for waste and mistakes.
Check the structural ceiling height to ensure enough space exists between it and the planned suspended ceiling. A minimum gap of 200mm is needed for most installations.
Identifying the Room's Centre Point
Start by finding the centre point of the room using diagonal measurements from each corner. Mark this spot clearly - it serves as the primary reference point.
Use a laser level to check if the floor is level. Note any height differences, as these will affect the final ceiling height.
The centre point helps create a symmetrical layout, which makes the finished ceiling look more professional. It also helps ensure cut tiles around the edges are equal in size.
Marking Guidelines on Ceiling
Use chalk lines to create a grid pattern starting from the centre point. These lines will guide the placement of the main runners and cross tees.
Mark the height for the wall angle around the room's perimeter using a laser level or water level. This line must be perfectly level to ensure the ceiling hangs straight.
Place temporary markers at key points where suspension wires will hang. The spacing between these points should not exceed 1200mm.
Install a sample grid section to verify measurements and spacing before proceeding with the full installation.
Installation Techniques and Tips
A suspended ceiling installation requires careful attention to detail and precise measurements at each step. Following proper techniques ensures a level, secure installation that will look professional and last for many years.
Securing the Main Tees
The main tees form the primary support structure of the suspended ceiling system. These must be perfectly level and parallel.
Begin by marking reference lines on the walls at the desired ceiling height. Use a laser level for accuracy.
Install wall brackets at 1200mm intervals, ensuring they're securely fixed into wall studs or solid masonry.
Hang wire hangers from the structural ceiling at 1200mm spacing along each main tee line. The wires must be perfectly vertical - use a plumb bob to check.
Connect the main tees to the wire hangers using special clips. Adjust the height as needed to achieve perfect levelling.
Installing Cross Tees and Wall Angles
Fix wall angles around the room's perimeter using appropriate fixings at 450mm centres. Use a spirit level to maintain accuracy.
Cut the wall angles at 45-degree mitres for professional-looking corners.
Insert cross tees between the main runners at 600mm intervals. Listen for the clicking sound that indicates proper engagement.
Critical measurements:
- Cross tee spacing: 600mm
- Main tee spacing: 1200mm
- Wall angle height: Consistent with main grid
Mounting Ceiling Tiles
Clean hands are essential when handling tiles to prevent marking. Wear cotton gloves if available.
Tilt each tile slightly and lift it above the grid framework. Lower it carefully into position.
Start from the centre of the room and work outwards. This helps ensure the border tiles are equal on opposite sides.
Cut edge tiles using a sharp utility knife and straight edge. Always cut tiles face-up to prevent damage to the visible surface.
Finishing Touches and Detail Work
Check each tile is sitting properly in the grid. Gentle pressure may be needed to ensure full engagement.
Install any lighting fixtures or other ceiling-mounted items according to manufacturer specifications.
Verify the ceiling is level across all areas using a long spirit level or laser level.
Clean any marks from the tiles using methods appropriate for the specific tile material.
Frequently Asked Questions
Installing a suspended ceiling requires specific tools and materials along with proper planning and safety measures. These common questions address the essential equipment, steps, and guidelines needed for a successful installation.
What essentials must one have to fit a suspended ceiling?
A basic toolkit for suspended ceiling installation includes a laser level, measuring tape, chalk line, drill, and tin snips. The installer will also need a reliable stepladder or platform to work safely at height.
Professional suspended ceiling installers recommend having safety gear like protective goggles, gloves, and a dust mask on hand.
Can you outline the step-by-step process for constructing a suspended ceiling?
Mark the desired ceiling height on all walls. Install the wall angles first, followed by hanging the main runners from secure fixing points above.
Cross tees should be fitted between the main runners to create the grid pattern. The final step involves laying ceiling tiles into the completed grid structure.
Which tools are indispensable for the installation of a drop ceiling?
Essential installation tools include a spirit level, hammer drill, screwdriver, and wire cutters. A laser measure helps ensure precise alignment.
Professional-grade aviation snips are crucial for cutting the metal grid components cleanly and safely.
What materials are typically involved in the erection of a suspended ceiling?
The primary materials include wall angles, main runners, cross tees, and ceiling tiles. Suspension wire and anchors secure the framework to the existing ceiling.
Fixings such as wall plugs, screws, and brackets must be rated for the weight of the complete system.
What guidelines should be followed to ensure compliant suspended ceiling installation?
The ceiling height must allow adequate space for services above whilst maintaining minimum room height requirements. Fire safety regulations dictate specific tile ratings for different building types.
All fixing points must support at least 25kg each, and the entire system should be level within 3mm over any 3-metre span.
Could you provide a checklist for all required items for suspended ceiling installation?
Tools checklist: laser level, drill, screwdriver, snips, tape measure, and safety equipment.
Materials checklist: wall angles, main runners, cross tees, ceiling tiles, suspension wire, anchors, and appropriate fixings.
Personal protective equipment: safety glasses, work gloves, dust mask, and appropriate footwear.